I made two new videos. You'll need to download and install the VP6 codec in order to watch them. One of them comes in several different versions. The other has three different versions so far. If you want to use them with HEG and BioExplorer, I've made a design which works well with them [Pocket Neurobics pendant; pocket]. The videos are free for all uses, but please give me money anyway.
For quite some time, my favorite way to do HEG neurofeedback with BioExplorer was with terranim_a.mpg and a design that ties the position in the video to the current HEG gain over baseline. I liked this so much that I decided to download the programs used generate this video (terragen and terranim) and make some more myself. I've currently made two videos which I consider usable. Here is what they look like:
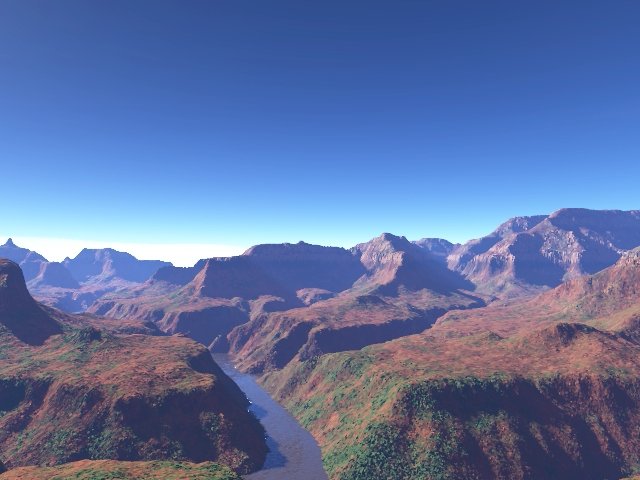
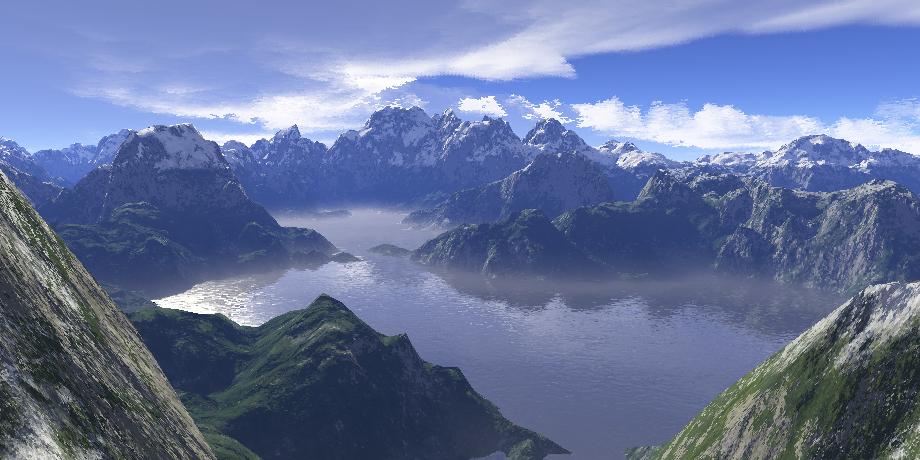
The first one is "Lakes and Mountains", and is completely computer-generated. It is 1267 frames long, which at 29.97 fps is 42 seconds. The second is "Grand Canyon_beta", and is based on the topographical data of the Grand Canyon, though I haven't gotten the surface texture quite right yet. It is 4951 frames long, which at 29.97 fps is 2 minutes 45 seconds. Both videos show the camera flying around a landscape in what is effectively a loop. This means that if you play one of the videos in repeat mode it will play seamlessly.

The videos do not have any sound. Lakes and Mountains comes in four versions:
The Grand Canyon_beta video comes in three versions:
The data rate doesn't make much difference in these videos; even the low–data rate versions look good. The video resolution makes a much bigger difference; however, the high-resolution versions need pretty fast CPUs, especially if you're going to be using one of the HEGFlight designs described below—with them, a 2.4GHz or faster processor is recommended for the high-resolution version. In short, if you notice jerky playback, try a smaller version.
As for the high-resolution, high–data rate version: I don't have enough disk space on my fast webserver at ocf.berkeley.edu, and I don't have enough bandwidth at jtoomim.org to make it available to everyone, so if you really want a copy of it, you'll have to email me so that I can send it to you personally.
(Warning: the next paragraph is pretty technical and not very important. You might want to skip them.) All of these versions use On2 Technologies' VP6 codec for compression. I used VP6 because it allows for a very good video quality-to-filesize ratio. Because I knew that these videos would be used for bidirectional playback, I had to do something special. Normal modern video compression codecs use (at least) two different types of frames: keyframes and interpolated frames. A keyframe can be decoded without any prior work being done, but for an interpolated frame to be decoded, the frame immediately before it must be decoded. This is normally not a problem, since when you play a movie forward you'll always have the previous frame already decoded; however, when seeking to an arbitrary frame or when playing a movie backwards that won't be the case. In this situation, the video decoder will go all the way back to the keyframe before the desired frame, then decode all of the interpolated frames until the desired frame is reached. This takes a lot of time. Most videos made nowadays have one keyframe for about every 300 frames, which would make playing a file back in reverse up to 300 times and on average 150 times slower than playing it forwards. To make bidirectional playback work better, I encoded these videos with a keyframe every 5 frames.
Unfortunately, the VP6 codec is not available for MacOS X, Linux, or any other non-Windows operating system. I have versions of these files encoded with the XVID MPEG-4 codec, but the same dilemma described above applies. Want one? Email me.
I've made a design for each of the Pocket Neurobics Pendant and Pocket for use with these videos. These designs will automatically take the baseline as the initial value of the HEG ratio. The position in the video is controlled by the percent gain in the HEG ratio, where (according to the default settings) every 40% gain corresponds to a complete revolution of the video. This means that when the HEG ratio increases, the video will play forwards, but when the video decreases, the video will play backwards, and in both cases the playback speed will be proportional to the rate at which the HEG ratio changes. Another way of understanding it is this: if the HEG gain is 0% the first frame of the video will be shown, if the gain is 10% the frame 25% of the way through the video will be shown, and so forth. If the HEG gain exceeds 40%, the video will begin over again, so a 50% gain will show the same frame as a 10% gain. These videos are made to loop seamlessly, so that does not pose any problems.
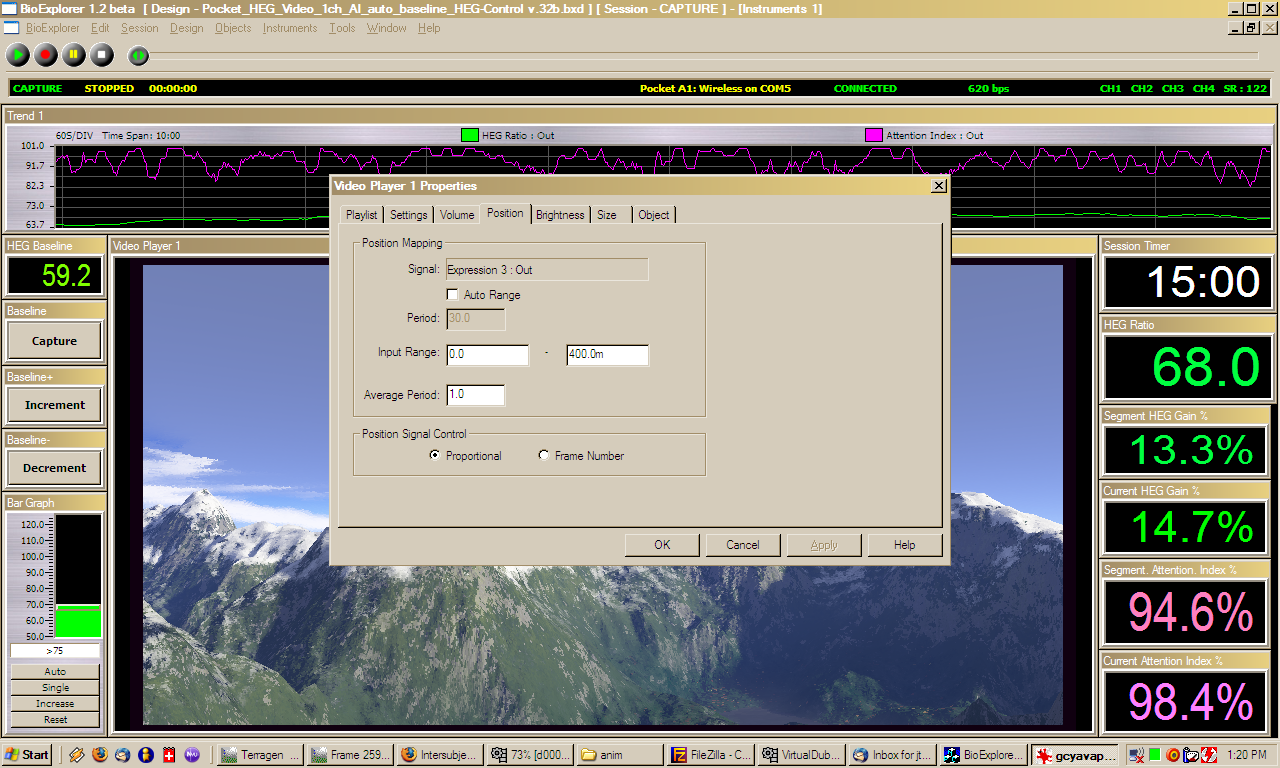
You can change the movement speed of the video if you find that the video moves too rapidly and is disorienting or moves too slowly and is boring. You can do this by changing what HEG gain is necessary for a complete revolution. For example, if a complete revolution is 80% gain, the video will move at half the speed that it would if a complete revolution were 40%. To do this, first right-click on the Video Player 1 object, then click on Properties. Next, click on the Position tab. This will give you a screen like the one above. The values you'll probably want to change are the two values for the Input Range. The Input Range numbers dimensions are percent HEG Ratio gain, where 400.0m = 0.400 = 40%. The gain required for a complete revolution is the difference between the two Input Range values, or Rangefinal – Rangeinitial. You can also change where in the video a person starts by changing both Rangeinitial and Rangefinal—for example, if you had values of -200m and 200m, the subject would start precisely halfway through the video.
If you have BioExplorer, but don't have the HEG equipment to interface with it, and want to see what this design looks like in action, you can use this file for playback.
Lakes and Mountains took my 1 GHz Pentium M laptop over one full week to render plus 6–20 hours for setup. I asked for donations to help pay for a new computer and (as of May 10, 2006) I've gotten $156 in paypal donations and about $140 in cash donations at various conferences. Thanks! Together with some money of my own (which basically came from my student loans), I bought a new $617.81 desktop computer with a 2.4 GHz AMD Athlon 64 3700+ CPU, and that does Terragen rendering at about four times the speed of my laptop and also has enough harddrive space to store the results. This allowed me to render the 640x480 Grand Canyon movie (which I'm not completely satisfied with--expect updates) in about ten days, whereas on my laptop it would have taken a month or more. If you want to help me pay that off, I suggest you make use of the PayPal link at the bottom of this page.